The GitHub CLI is an indispensable tool as a project maintainer or contributor on GitHub. It can boost your productivity when getting things done.

The day my brain exploded was when I discovered (spoilers) that you could create a pull request using the GitHub CLI.
Let's get started!
Install the GitHub CLI
Head on over to the installation docs to get the GitHub CLI set up. There are installers for Linux, Windows, and macOS.
Log In to GitHub via the GitHub CLI
You're up and running but if you try to run any commands, you're going to be prompted to log in, so let's do that first.
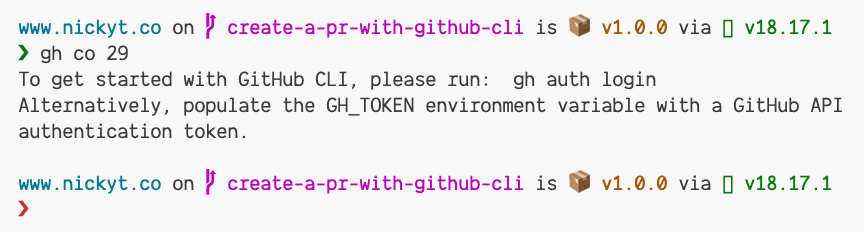
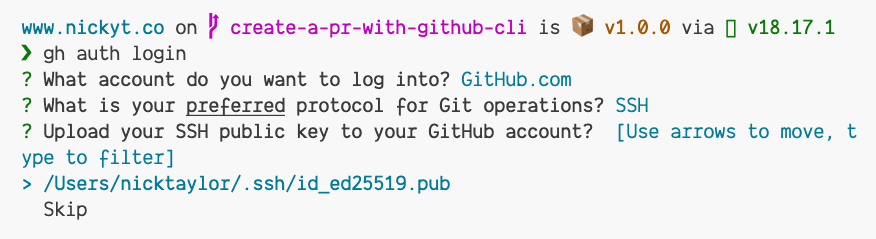
To log in to GitHub via the GitHub CLI, run gh auth login.
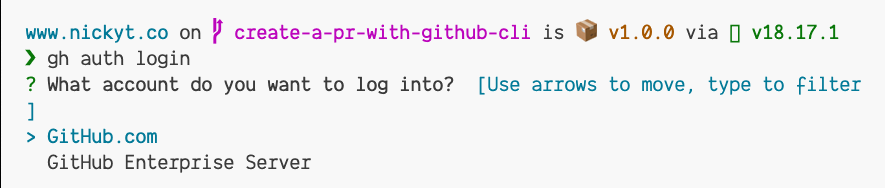
You'll be given two options for logging in. GitHub.com or GitHub Enterprise Server. In most cases, unless your company uses GitHub Enterprise Server, you'll select the default, GitHub.com.
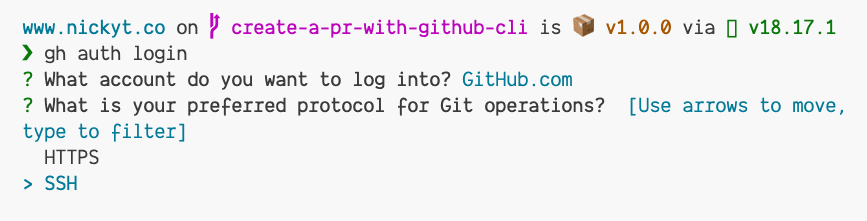
Next, you'll be asked which protocol to log in with. The default is HTTPS, but I recommend SSH. To learn more about configuring GitHub with SSH, see Connecting to GitHub with SSH.
Login via SSH
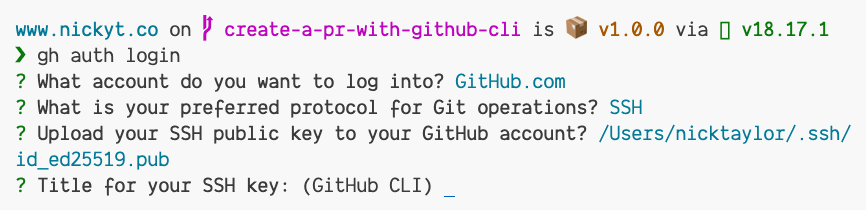
Next, it will ask you to publish your public key to GitHub. This is safe to do and you can proceed.
It will prompt for a title for the key. Using the default value of "GitHub CLI" is fine.
Login via HTTPS
If you choose HTTPS, you'll be asked to authenticate Git with your GitHub credentials.

Press ENTER to continue.
Finishing Login Process
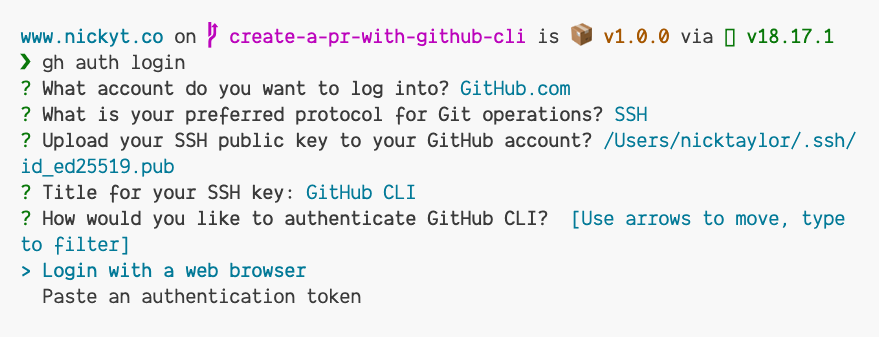
Next, you'll be prompted to log in via the browser or a token. To be honest, I've never used a token at this step. I always log in via the browser. If you have a token, go for it.
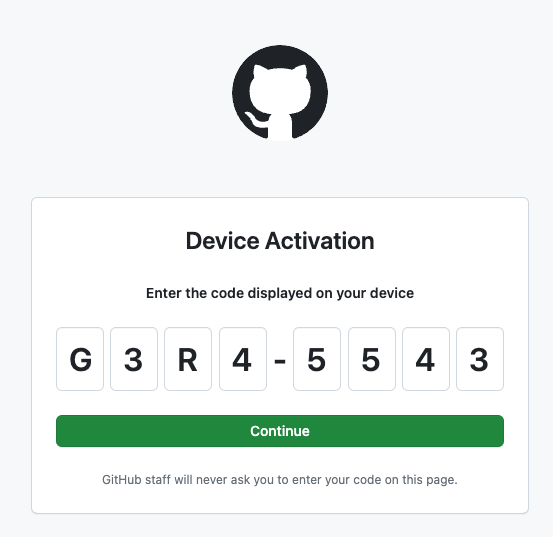
You'll be given a code in the CLI that you need to copy (changed to some code in my screenshot) and then press ENTER to log in via the browser.
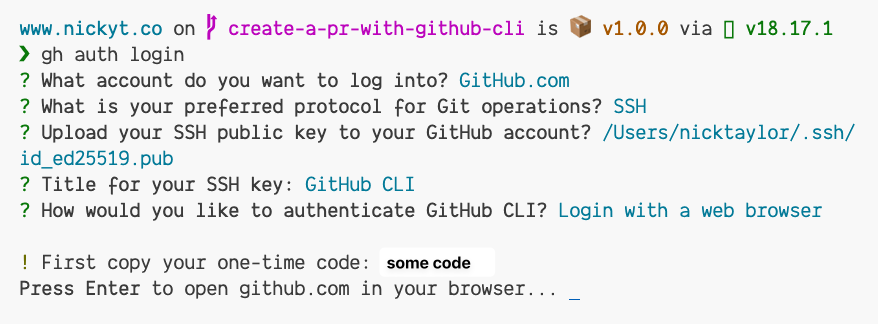
Paste or type in the code and press the Continue button.
Next, you'll be asked to Authorize GitHub. Click the Authorize GitHub button.

At this point, depending on how you have the security of your account set up, you may be asked to log in via the GitHub mobile app.
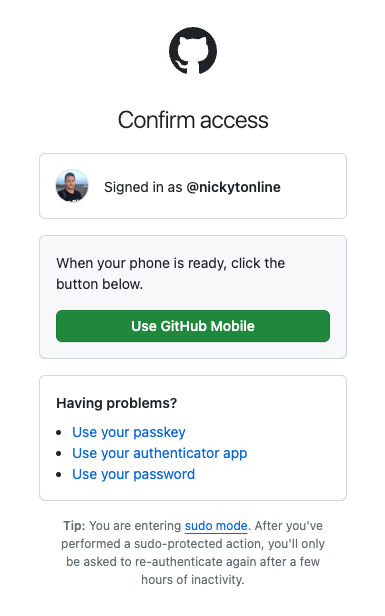
Log in via the GitHub mobile app or other multifactor authentication methods you have set up.
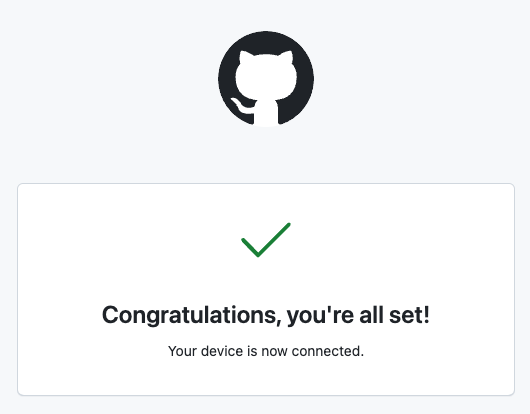
At this point, you should be all set up.
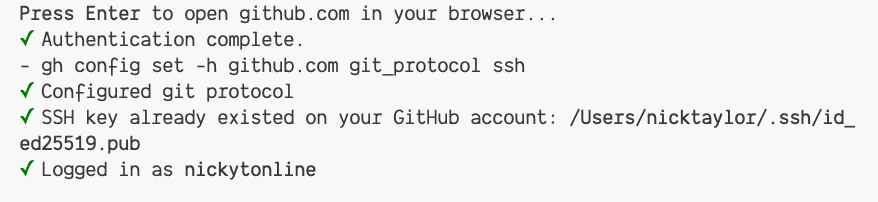
And if you go back to the command line, you should see something similar to this.
Useful Commands
Let's walk through a couple of commands I use every day, and then we'll check out some other useful ones that I use less frequently.
Reviewing a Pull Request
As a maintainer of a project, you will definitely be reviewing PRs (for external contributors or team members). Before we had the GitHub CLI, I always had to Google how to get someone's PR on my local machine with Git. I forgot all the time, so, at one point, I made a Git alias for it. The command looks like this, git fetch origin pull/pr_number/head:name_of_branch. So if I was going to review pull request 1234, the command would look something like this, git fetch origin pull/1234/head:pr-1234. You can call the branch whatever you want. I used to name it pr- with the number of the PR.
None of that is necessary these days. With the GitHub CLI, all you need to do is cd into the project directory in your terminal and then run gh co pr-number, e.g. gh co 2062
Here it is in action for a recent pull request I reviewed for the OpenSauced app repository.
Creating a Pull Request
Before the GitHub CLI, I used to push my branch to GitHub, and then I would go to the repository's page on GitHub.com and create a pull request from there.
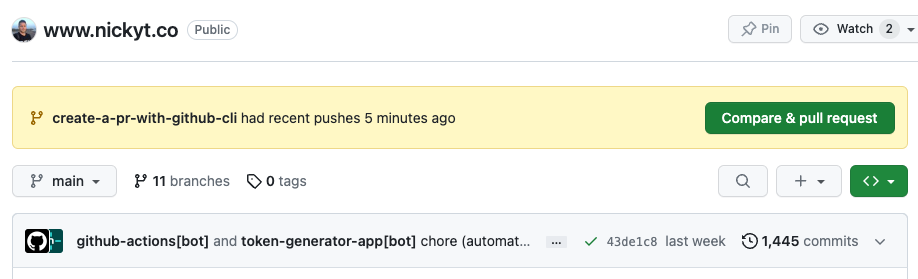
Although that works, when I discovered that the GitHub CLI could do this, I was blown away. All you need to do is run gh pr create from the command line, assuming you're currently on the branch of the repo you want to associate with the pull request. You can provide additional arguments, e.g. gh pr create --draft or the shorter version gh pr create -d, but typically, when I'm creating a PR, I go through the steps in the CLI and continue the final step in the browser. It's a preference, so do what works best for you.
Here's me creating a new test PR.
Creating or Pushing a New Repository to GitHub
In the past, I always used to create a new repository from GitHub.com.
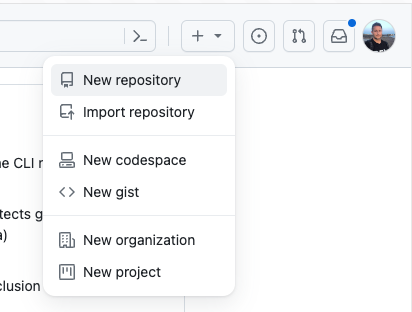
I'm sure there is a way to create a repository on GitHub from the command line, but I never bothered to learn it, and now I don't really need to thanks to the GitHub CLI.
Create a Repository from Scratch
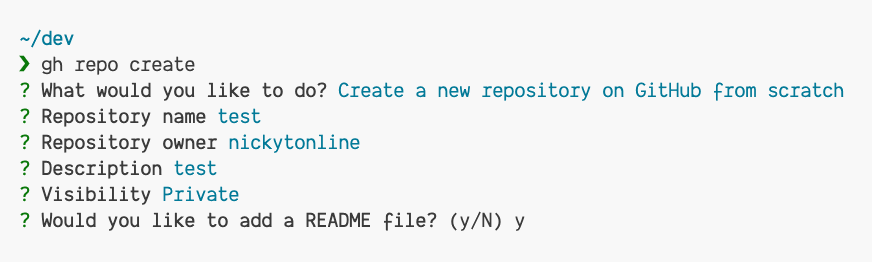
To create a repository from scratch, run gh repo create from the command line.
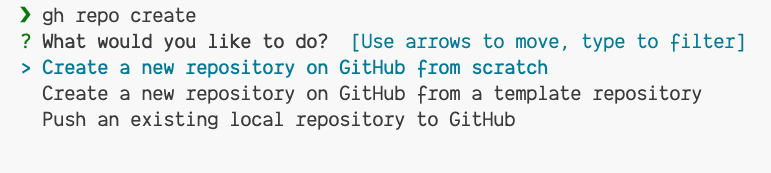
Select Create a new repository on GitHub from scratch and press the ENTER key.
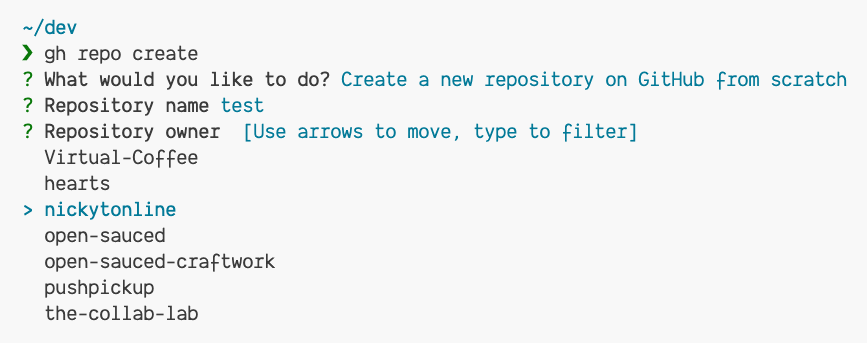
Next, you'll be prompted to name the repository, e.g. test.

Next, choose the repository owner. If you're a part of one or more GitHub organizations, they will appear in the list. For our example, I will go with my own account, nickytonline as the repository owner.
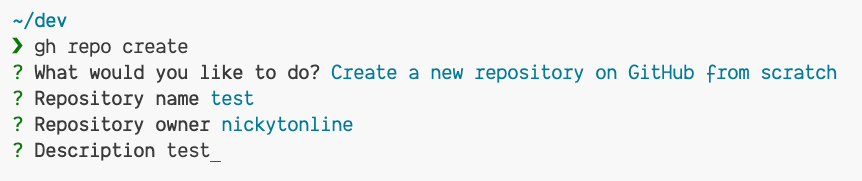
Add a description for the repository, e.g. test or leave it blank. It's not required.

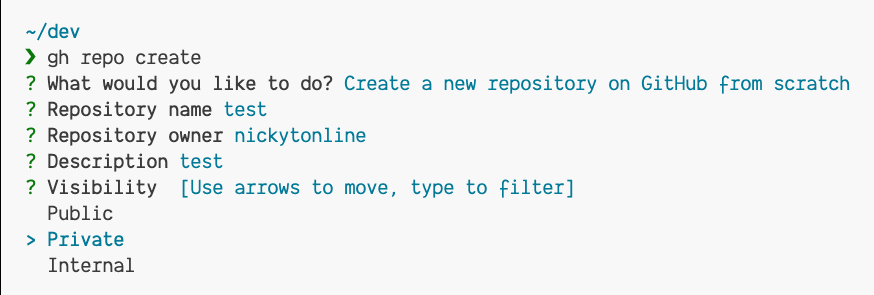
Next, set the visibility of the repository. It can be public (default), private, or internal.
Since this is a test repository, I'm going to set it to private.
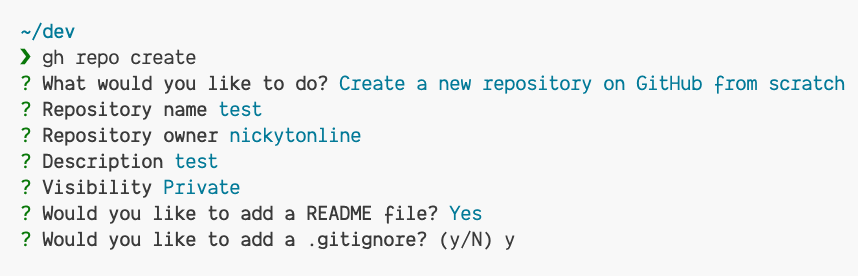
Next, you'll be asked to create a README file. Type y and press the ENTER key.
You'll be prompted to add a gitignore file. Type y and press the ENTER key.
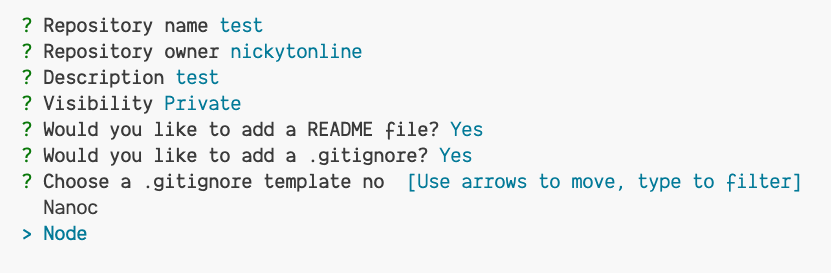
Next, choose the language that will best reflect the contents of the gitignore file. I do a lot of JavaScript, Node.js and TypeScript, so I'm going to choose Node.
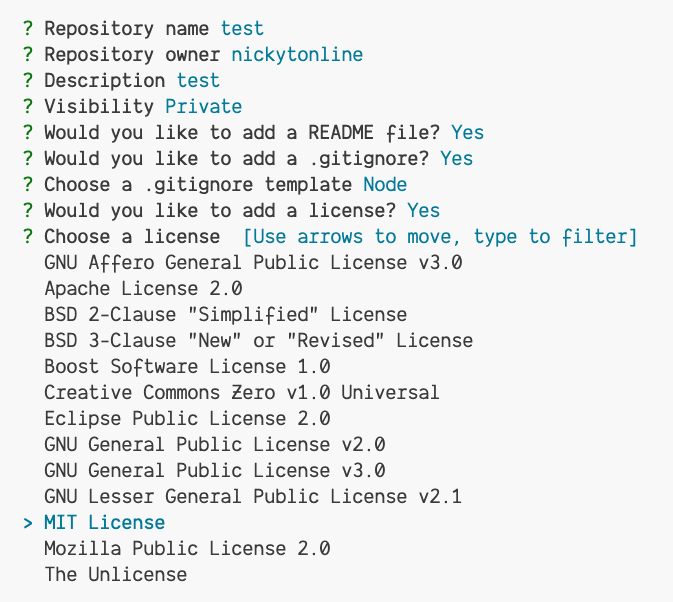
You'll be asked to add a license. Type y and press the ENTER key.
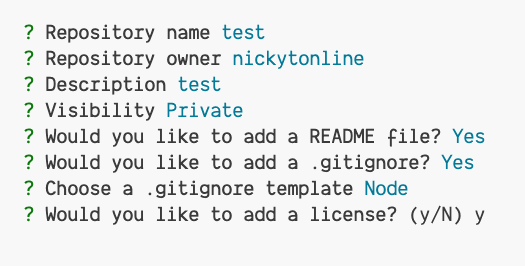
Choose the license that makes the most sense for the project you're creating. For the purposes of this blog post, I'll choose the MIT license.
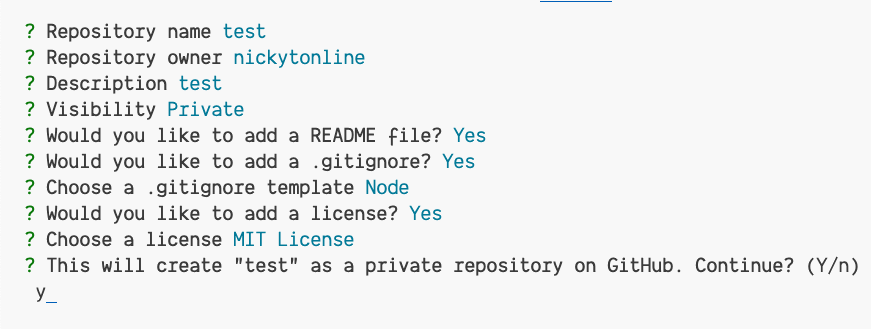
A quick check will ask if you want to create the repository on GitHub. Type y and press the ENTER key to proceed.
Next, you'll be asked if you want to clone the repository locally.
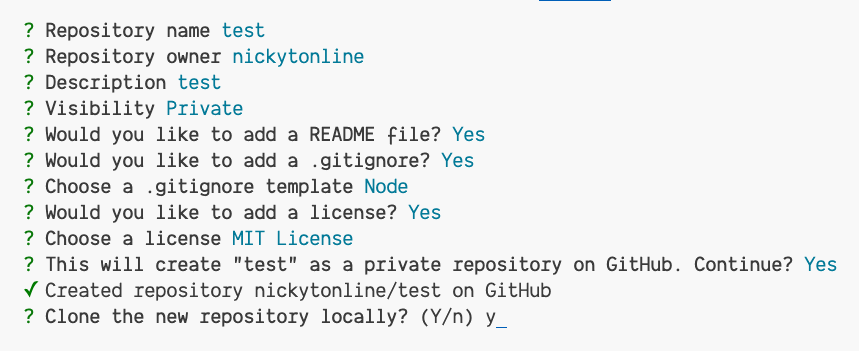
Type y and press the ENTER key to proceed.
The new repository is on GitHub.com now and has been cloned on your machine.
Push an Existing Local Repository to GitHub
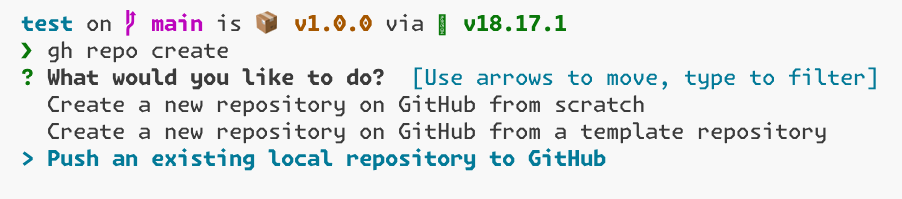
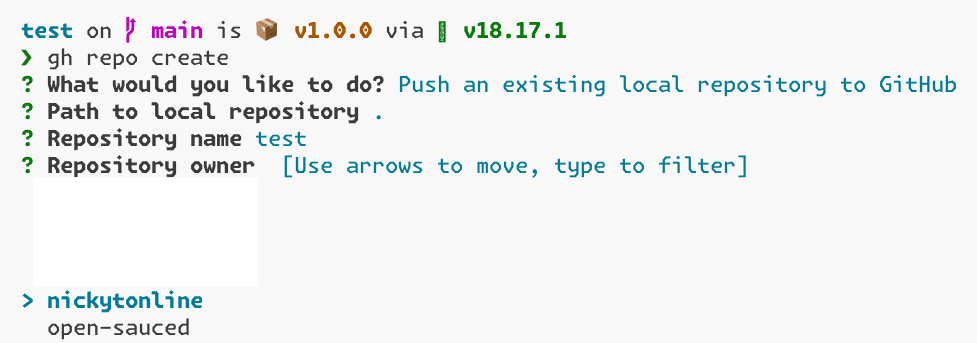
To push an existing local repository to GitHub, run gh repo create from the command line.
You'll be prompted for the path to the local repository. It defaults to ., the current directory. If, for some reason, you ran the command outside your local git repository folder, specify the folder to your repository.

Next, you'll be asked to name the repository. By default, it will use the name of the folder the local repository resides in, e.g. test. Change it if it makes sense to.

Next up, you're prompted to select a repository owner. By default, it's your user, e.g. nickytonlin, but you can select any organizations you're a part of as well.
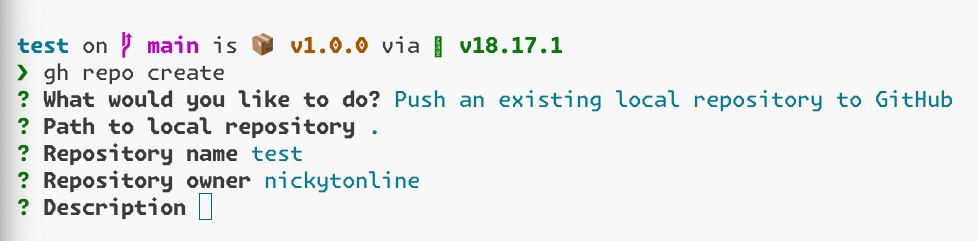
Next, you'll be asked to add a description. You can add one or leave it blank. It's up to you.
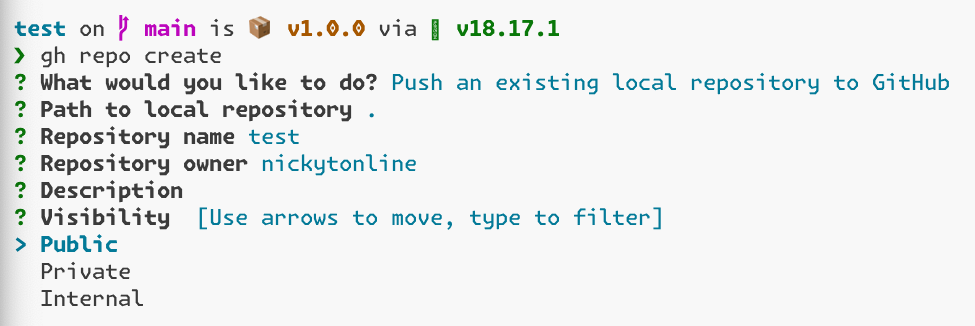
Next, you'll be asked to set the visibility of the repository. It can be public (default), private, or internal.
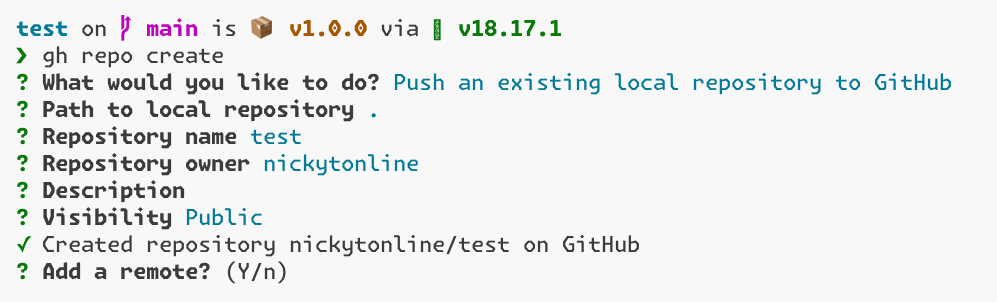
Next, you'll be asked if you want to set a remote. Press enter to say yes (the default)
You'll be asked what the new remote should be called. Press the ENTER to accept the default name of origin. The GitHub CLI notifies you that the remote has been added, e.g. git@github.com:nickytonline/test.git
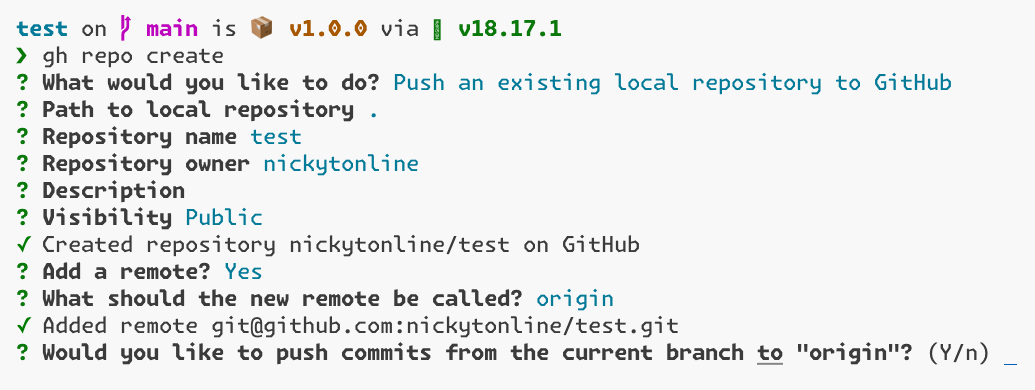
And finally, you'll be asked if you want to push the commits from the current branch to the origin remote. Press the ENTER key to push the commits, and you're done!

Conclusion
For myself, the GitHub CLI has become a game changer in my day-to-day workflow. I literally use it every day, well, work days. 😎
From creating a new repository, to pulling down a pull request (PR) to creating a PR and more, the GitHub CLI has become indispensable to me.
There is a whole other set of commands available in the GitHub CLI that I encourage you to check out and that, to be honest, even I should explore further.
I realize not everyone is comfortable with the command line, but I think that if you give the GitHub CLI a chance, you may grow to love it. As always, though, use the tools that make you the most productive.
Stay saucy peeps!
If you would like to know more about my work in open source, follow me on OpenSauced.